When saving SVG (scalable vector graphics) in Adobe Illustrator, there are some things you should know that will affect the quality of the SVG files you produce.
Disclosure: If you make a purchase using my links to Adobe’s website, I may earn a commission (which helps support me).
Ways to Create SVG in Adobe Illustrator
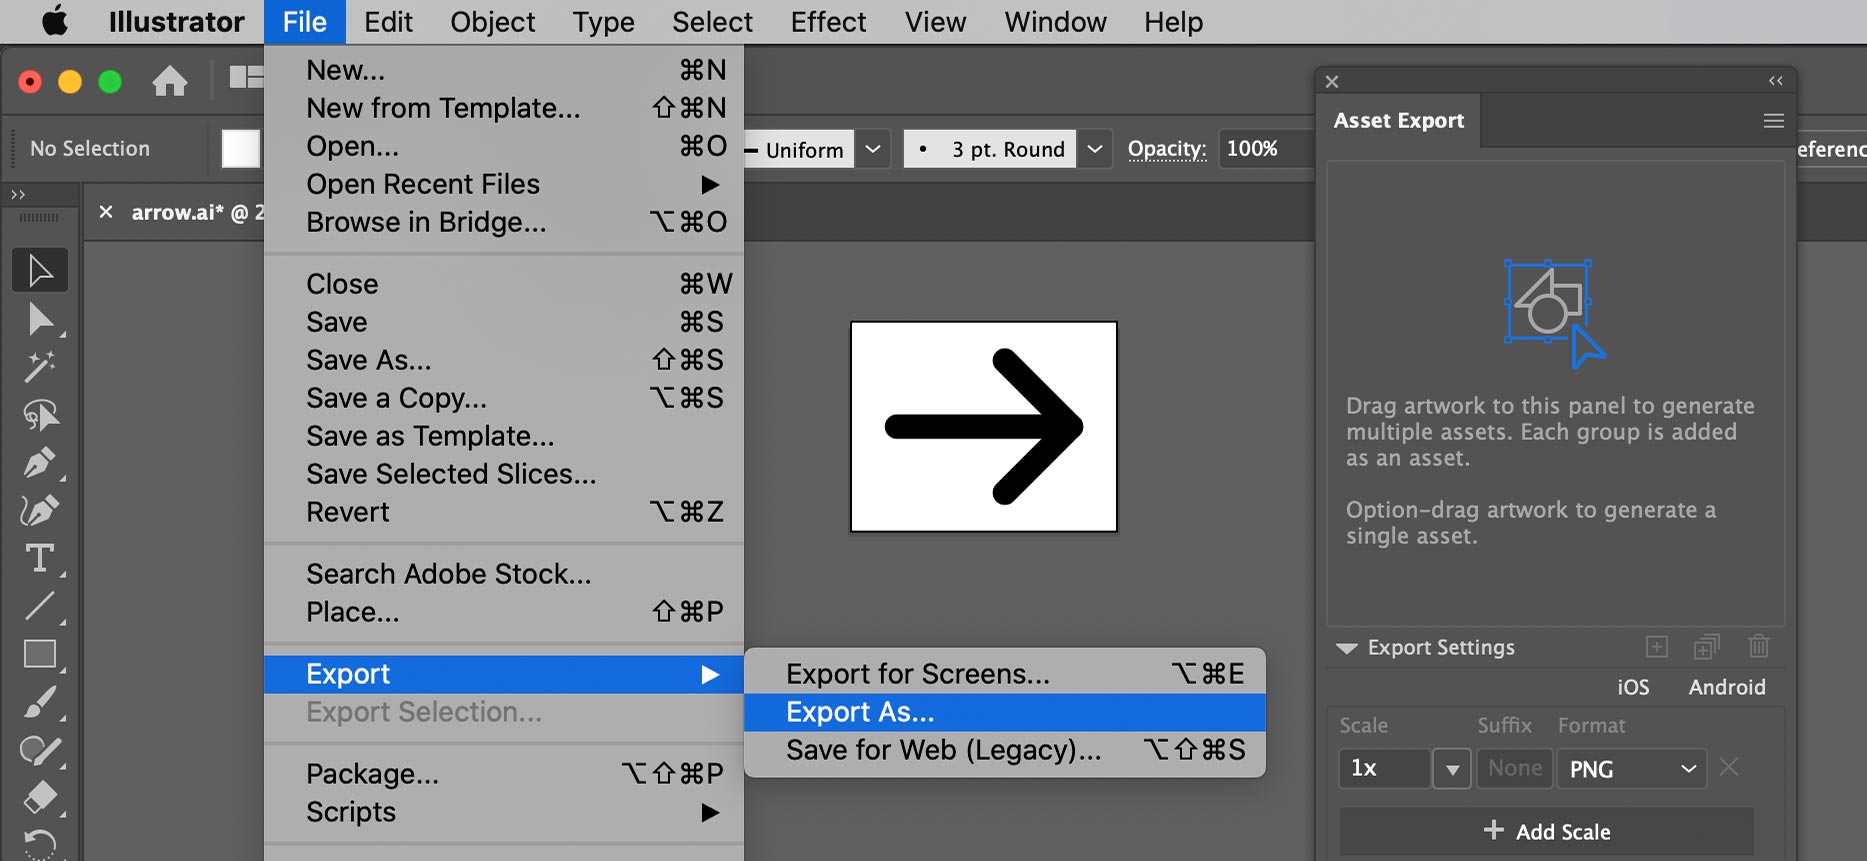
File > Export > Export As (and Export for Screens):
- This newer export produces more optimized, smaller files with cleaner code than File > Save As.
- Ignores the artboard size and automatically trims to the size of the graphics.
File > Save As:
- This older export produces less efficient, larger files that are not as cleanly coded as File > Export.
- Uses the artboard to define the size of the SVG. To fit the artboard to your graphics, choose Object > Artboards > Fit to Artwork Bounds.
Asset Export panel:
- Lets you export multiple SVG files from specific graphics within a single Illustrator file.
- Codes SVG files the same way as File > Export.
Copy and Paste:
- Instead of exporting an SVG file, you can copy graphics in Illustrator and paste into a code editor to get the SVG code.
- Codes SVG the same way as File > Save As (which is not as good as the other methods).
SVG Export Options
In the SVG export dialog you should pay attention to the settings (don’t just accept the defaults).
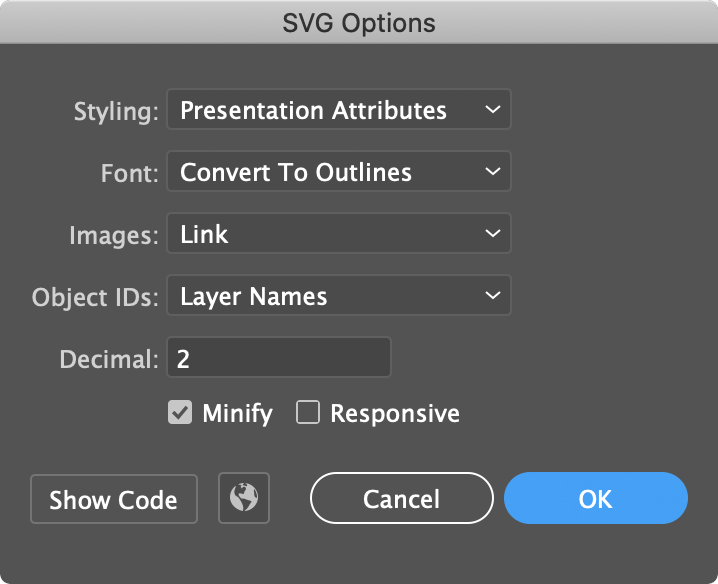
The Responsive option: I recommend unchecking Responsive because of the following:
- When Responsive is checked, Illustrator will not code in a width and height, which can cause problems in Microsoft Edge and Internet Explorer. Additionally, without a width and height the SVG will automatically scale up or down to fill the container, forcing you to always code it to the size you want it.
- When Responsive is not checked, Illustrator will code in a width and height. When the SVG is put into a webpage, it will appear at the size you designed it (rather than automatically scaling up/down to fill the container). This is nice because you don’t have to code the width/height every time you want to use the SVG. If you need to override the size in the SVG, you still can.
- The Minify option: Check this on to reduce the file size, which is good for websites!
The Font option:
- Convert to Outlines will turn the text into vector art so you don’t need to worry about fonts. Because it’s no longer text, it cannot be selected, copied, and isn’t as good for accessibility and SEO.
- SVG will keep the text editable, but the webpage will need to load any non-standard fonts used in the SVG. This creates cleaner code, with text that can be selected and copied. It’s also good for accessibility and SEO.
The Styling option affects multiple things, such as file size, ease of editing, and ease of overriding the styling with CSS:
- Inline Style codes a style attribute on each element. These are the hardest to override with CSS.
- Internal CSS codes class rules into an embedded style tag. These are easier to override with CSS than inline styling and may be more efficient (smaller files) for some graphics.
- Presentation Attributes codes various attributes (fill, stroke, etc.) on each element. These are the easiest to override with CSS.
- To view/change the SVG Export Options for the Asset Export panel, go into the panel menu at the top right of the Asset Export panel and choose Format Settings. Then on the left, select the SVG category.
- To view/change the SVG Export Options for the Export As Screens dialog, click on the Gear icon on the right. Then on the left, select the SVG category.
Other Tips
- Layer and group names are coded as IDs in the SVG. Give them unique names if you’ll be overriding the CSS, or animating elements with JavaScript (GSAP is especially amazing for this). Group elements that you want to animate together (and name them appropriately).
- Work at 1x size. Don’t know what I mean by 1x? Read my article Retina Web Graphics Explained: 1x versus 2x.
Conclusion
I hope you found these helpful. If you aren’t already using SVG instead of PNG for your vector graphics you should be!
If you have any tips that I missed, feel free to share them with me on social media.